My father and I installed the engine mount. Six bolts (three different lengths). Only a small amount of reaming necessary to get the bolts in. Had to search for the AN1149FO632P washers called out for the top two bolts. Had a slight interference issue with one firewall item.
Began fabrication of the main gear leg components.
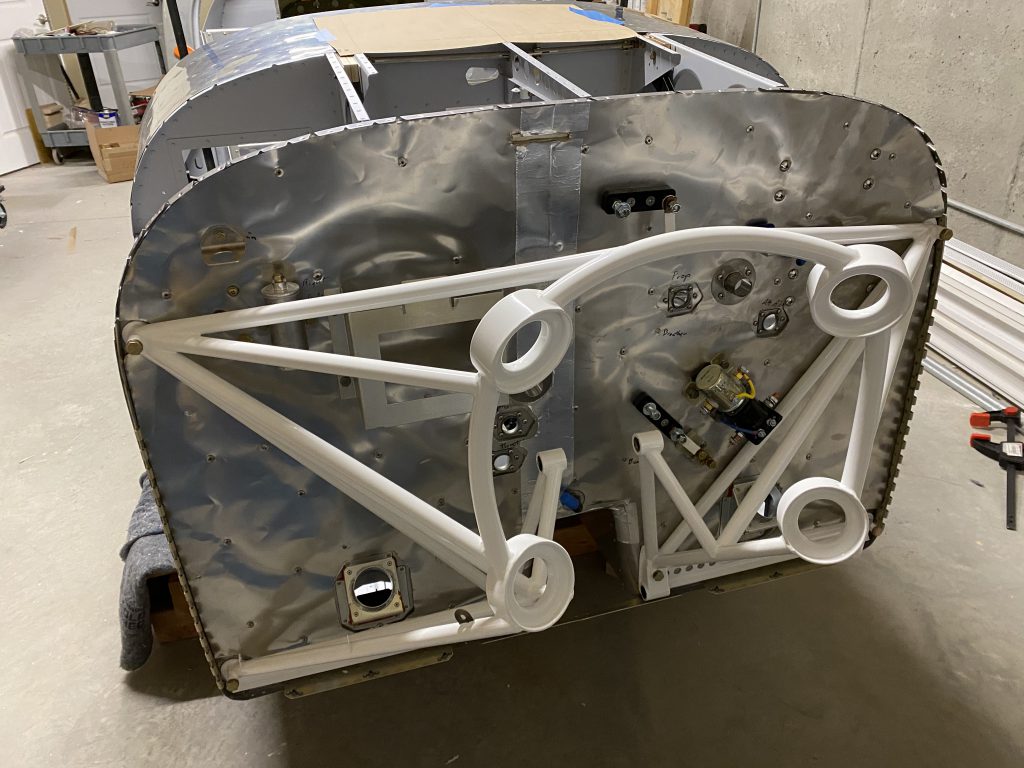
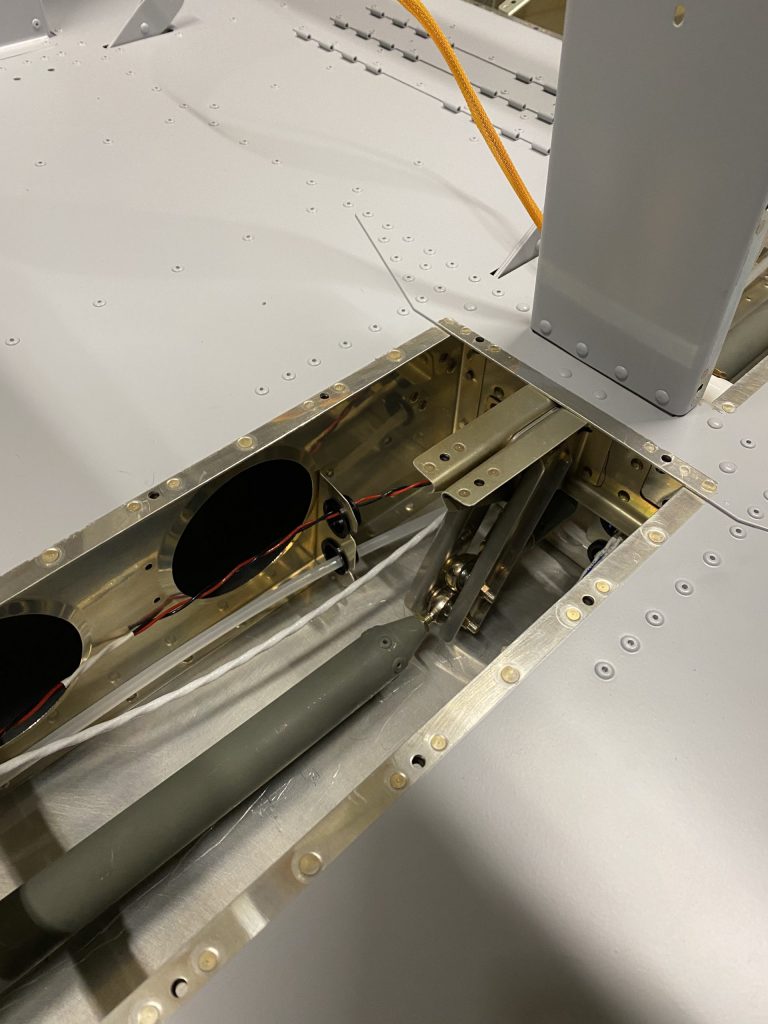
The airplane has two alternators (primary and standby). The larger primary runs off a drive belt while the smaller standby alternator is mounted on the accessory drive pad on the engine. They are B&C alternators so they each have an external voltage regulator. Many people mount the regulator(s) in the engine compartment on the firewall. B&C actually recommends they be mounted away from heat, moisture and vibration. Jon and I decided to put them in the “pit” on the backside of the firewall. Much cooler and drier and presumably less vibration in this location — but more difficult to get to if maintenance is necessary.
I will move the engine oil pressure sensor line on the front side of the firewall which has a minor interference with one of the bolts used to mount the primary alternator voltage regulator.
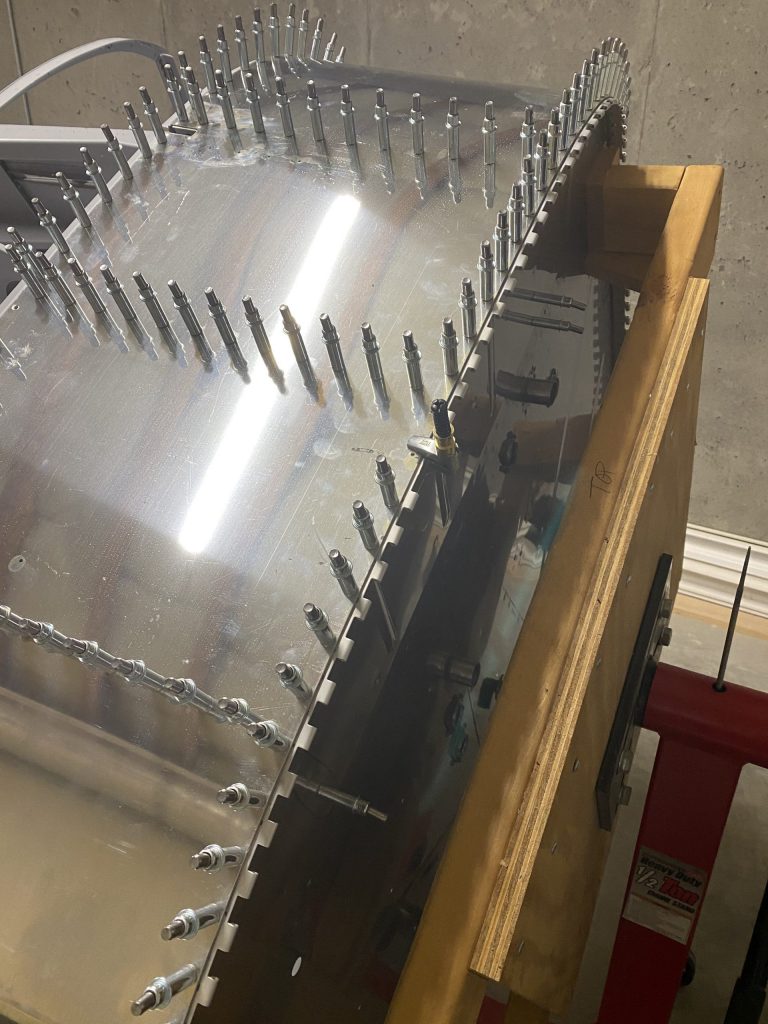
The hinge holds the upper cowling to the firewall. To remove the cowling, you pull the hinge pin out and the cowling can then be removed.
I have struggled with this seemingly easy step for a couple weeks. The instructions appear to have an error in them. The index holes that they call for do not line up with the holes in the firewall flanges and the top skin.
I also was concerned that the holes in the hinge that they call for in the instructions will be too close to the edge of the hinge. I have seen two different tolerances for edge distance: 2 diameters and 1.5 diameters (from the center of the hole to the edge). In this case, that would mean an edge distance of 3/8″ or 9/64″. My first attempt was a little shy of that smaller distance. Perhaps a more experienced builder would have ignored this and continued on but it bugged me.
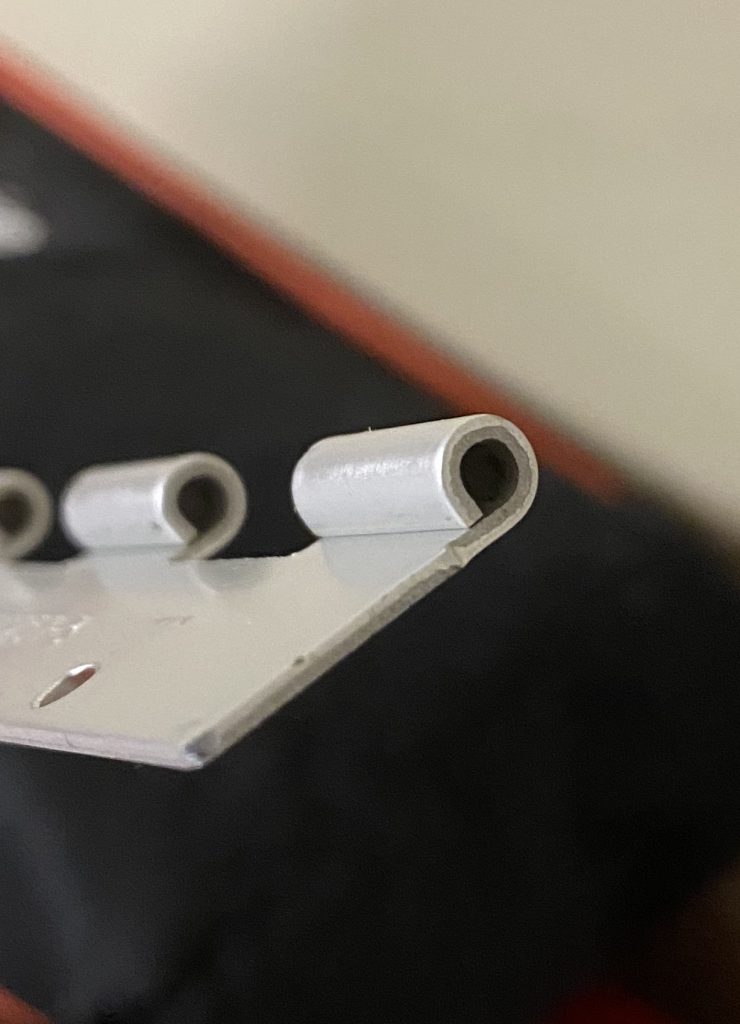
While doing research on this topic I found Stu’s Aircraft Factory on Youtube. He built an RV-8. He has lots of interesting building tips. He mentioned in one video that the piano hinge supplied by Van’s is MS20257-3 and is susceptible to having broken knuckles (eyelets) over time. He recommended substituting MS20001P-3 extruded aluminum hinge. About 4x more expensive, but I decided to go with it since I had several broken knuckles on the RV-8 and RV-10 that I had owned.
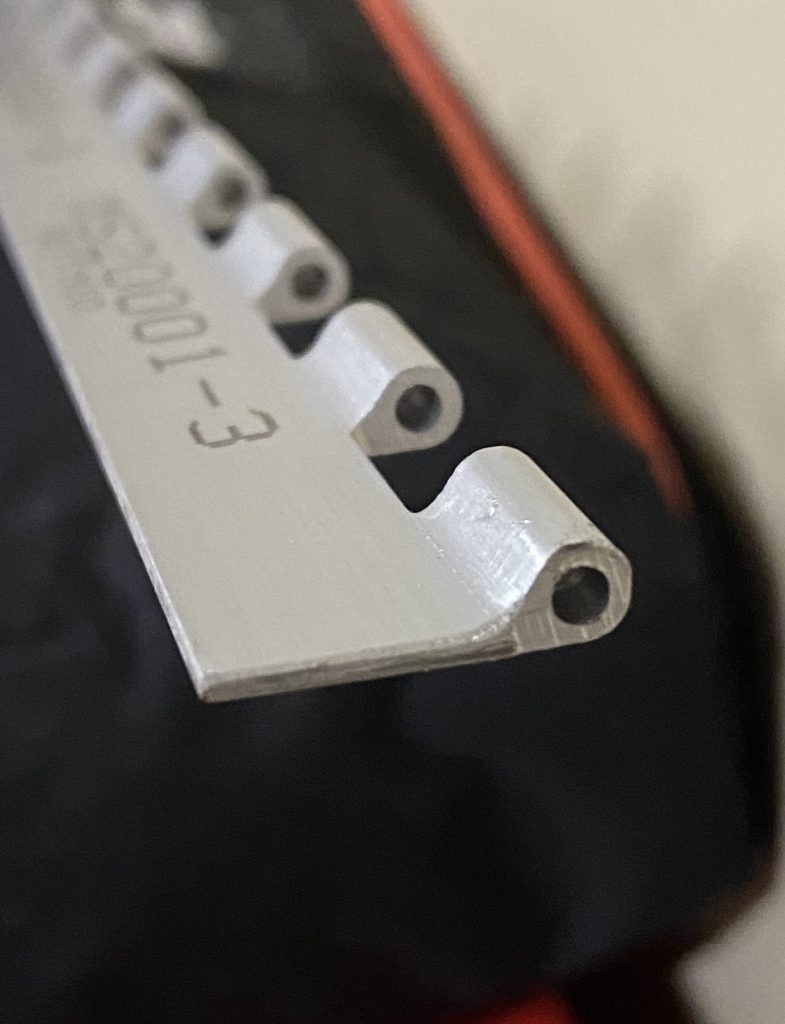
I am confident in saying he was right and the added expense was worth it. Look at the difference between the two parts in the following pictures.
This is the original part from Van’s, an MS20257-3. Each knuckle is just formed by rolling the edge. Here is the more expensive MS20001P-3 extruded part. You can see each knuckle is one much more substantial piece.
I spent about an hour putting the hinge on and match drilling it. I am happy with the result so far.
As usual a couple steps forward combined with a step or so backward.
We removed the airplane from the rotisserie (so we could access the firewall).
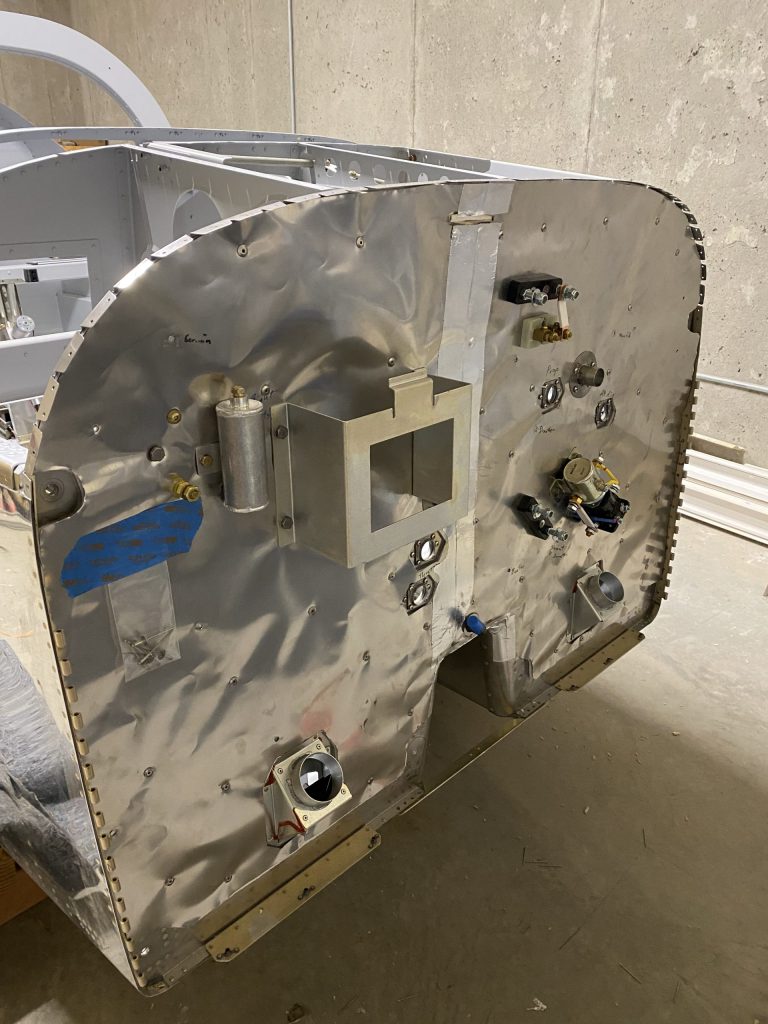
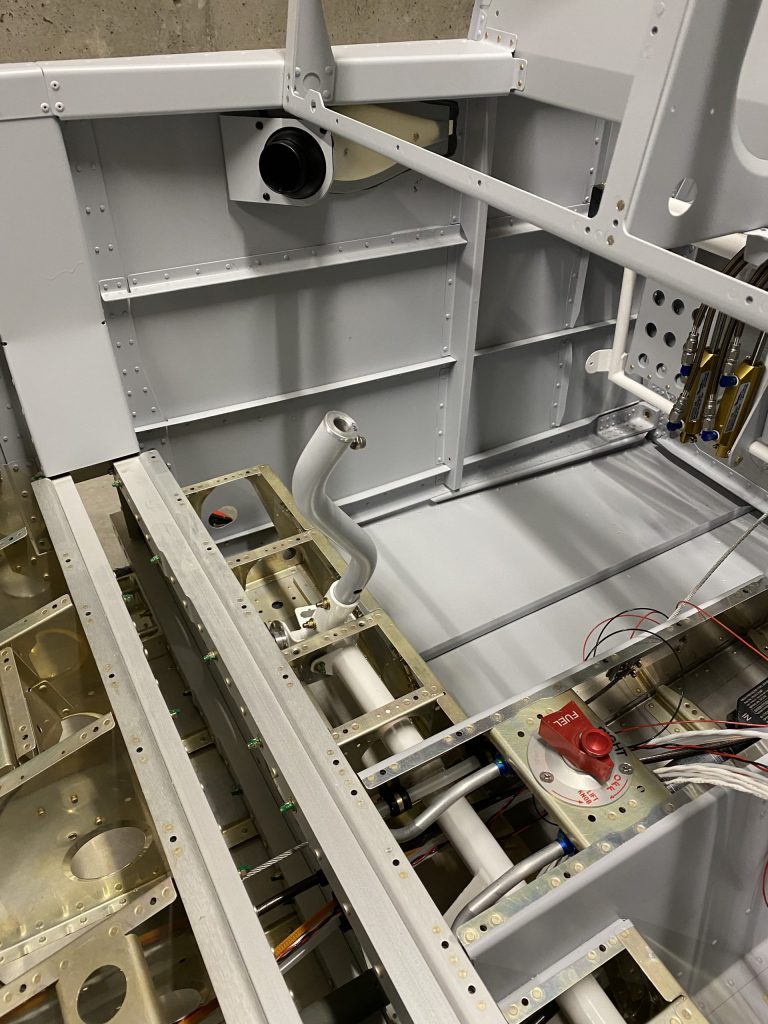
We worked on the stainless steel/fiberflax barrier for the firewall. This is designed to prevent a firewall forward fire from penetrating the cockpit. The challenge is that there are all kinds of penetrations that have to be cut out. Stuff like the master solenoid, the starter solenoid, the brake master cylinder, and various other components that are either mounted on the firewall or pass through the firewall.
There were also about 50 stainless steel rivets to install that hold the insulation “sandwich” to the aluminum firewall itself.
I installed the idler arms and linkages for the elevator control tubes. Not that difficult though I spent a fair amount of time getting washers and nuts all lined up in a fairly confined space.
I put the left stick together (twice since I initially had it backward) and installed it in the airplane. I will do the right stick next time I am in the workshop.
This is where I made my mistake that will require ordering more parts from Van’s. The top forward edge of the firewall has a piano hinge that is used to secure the back of the engine cowling. I carefully followed the directions but ended up with the holes too close to the edge of the hinge (I contend the plans have an error in them). The part is only $17 and I will add it to the finish kit which is being crated as we speak. Hopefully, I will have it in two weeks.
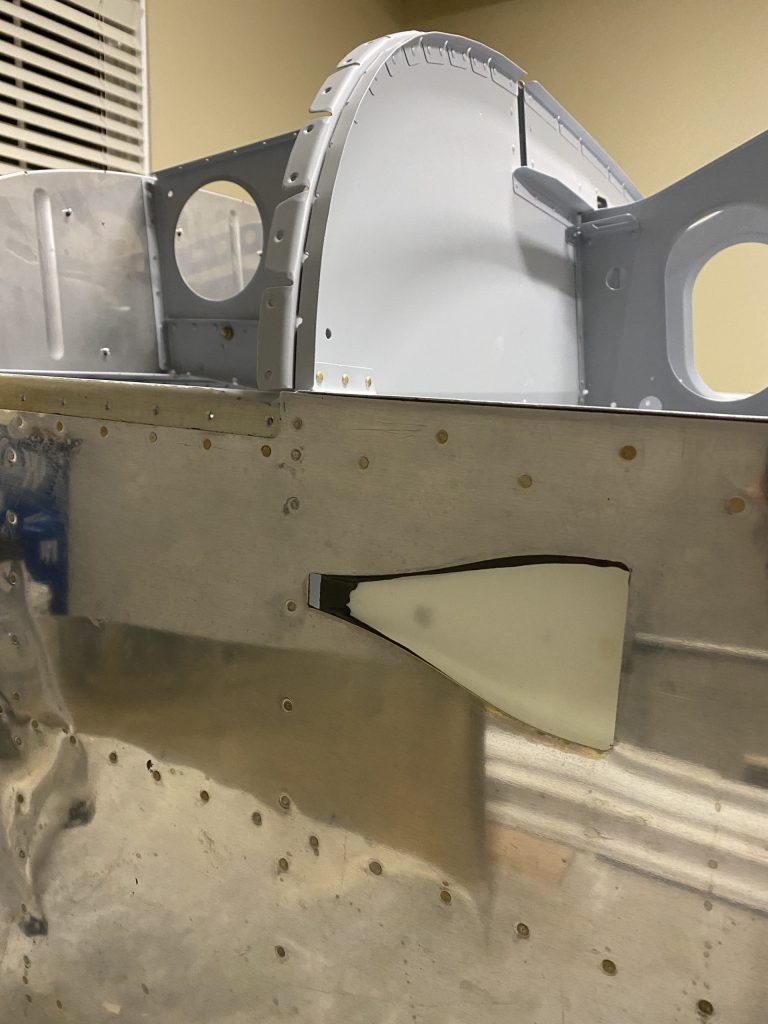
I also found an “oops” from a previous work session (NACA vent moved).
I got word that the Lycoming Thunderbolt engine that was originally supposed to arrive in March is now scheduled for May. Not too bad since I suspect I won’t be ready until late April anyway.
Propeller should be sooner. Also the interior (seats, stick boots, side panels etc.) should arrive from the manufacturer in Europe in about three weeks.
It is definitely starting to look like an airplane.
14 hours (2 people times 7 hours each)
Battery box , master cylinder, fuse blocks, solenoids etc. The piece of blue tape is just there to hold a small baggie of stainless steel rivets to remind me to put those last 4 rivets in after I confirm the cut outs for the motor mounts are the correct size.Idler arms and elevator control tubes installed.Pilot’s stick installed.Here is the “oops” that will be difficult to fix. The NACA vent moved backward about half an inch after I installed it with ProSeal. Here is the $17 mistake. That piano hinge needs to be set back more flush withe the front edge of the top skin. The drawings have it out that far, but when you match drill the holes they end up very near the back edge of the piano hinge. BTW, squeezing that many clecos (putting them in and taking them out) can really do a number on your hand muscles.